It is December already! This year has flown by!
With the start of a new month, it is time to pull the Block of the Month projects out. This month we have the last block of our Garden Sampler as well as finishing. The sashing in this quilt is quite intensive, and I, through the midst of vacations, working, and renovations was only able to get one section of sashing done and one cornerstone block finished to show you how I would do it. You'll have to watch our Facebook and Instagram page in the new year for my finished project, and if you haven't sewn along get your hands on a BOM Kit for it.
Now lets jump in to Block 12!
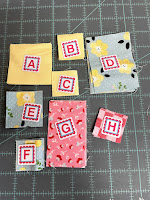
Below are my cut pieces, labeled with my alphabitties to keep them straight.
I cut all my pieces according to the pattern this time.
Unfortunately I forgot to take pictures while I made the block 😔
I guess I really got into the zone.
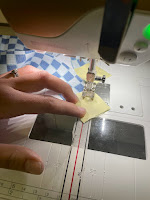
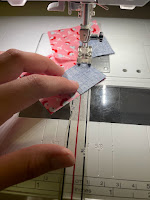
For all the flip-and-stitch corners I used my Diagonal seam tape, which I will demonstrate below in the sashing components.
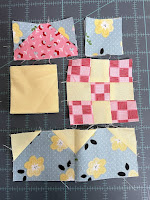 |
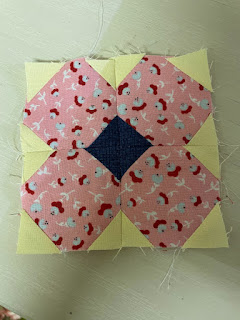
| The Components The center of this block is constructed in a simple 9-patch fashion. |
After that I simply put the outer edges on my block and it is complete!
And how cute is it?
 |
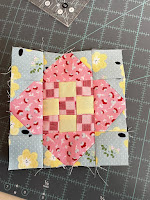
| Block 12 Once that is done it is time to start on the sashing. The cutting for the sashing looks quite daunting, my stripology ruler was a real time saver here. The ruler has slits at every 1/2" that you can put your cutter into. There is also a mark on each 1.5" cut and each 2.5" cut, which are the most common cuts needed, and it takes the math out of the process. 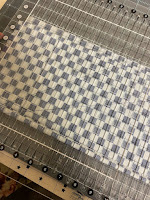 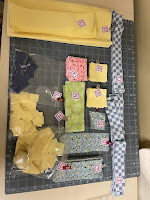 The pieces for the sashing I labelled my piece with alphabitties and wonder clips. For the small pieces that I needed to cut approximately 240 pieces of I used a ziploc bag and wonder clipped the letter to the top of the bag. I then took my 12.5" square ruler, found the center of my square and the ruler, and trimmed all 4 sides. |

After the sashing frame we need to do a navy frame. On one of the edges there is a flip-and-stitch corner. I used my diagonal seam tape for this.
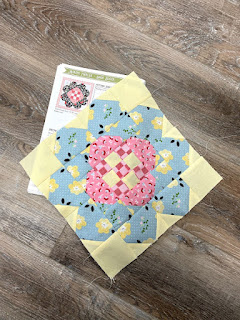
Once you have the navy frame on play around with the layout for a while until you are happy with it. It does not need to be exactly in the same order as the pattern, but what makes you happy and love it.
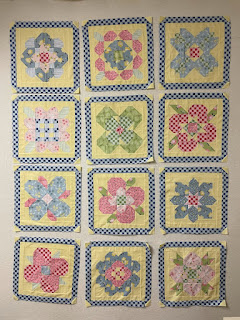
This is the layout I settled with.
Next we need to make our cornerstone flowers. Each Flower is 4 squares with all 4 corners
flip-and-stitched, one with a navy, and three with a background. Again I used my Diagonal Seam Tape.
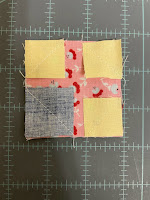
Trim 1/4" away from all the seams and press.
Then sew into a 4-patch with all the navy pieces in the center.
How cute is this cornerstone flower?1? I just love it!!!
Next is the sashing section, the green rectangles all have 3 flip-and-stitch corners. Once these leaves are made join two together, with a square in between. Make sure that the side with 2 flip-and-stitches goes toward the square. Then attach a background too each side and you are done the section.


That's as far as I was able to get this week. The outer border also is just flip-and-stitches.
Watch the Facebook and Instagram page for my completed quilt. Thanks for following and sewing along with me this year.
I hope everyone has a fantastic holiday season and a very Merry Christmas, surrounded with family and friends. I am excited to be travelling up north to see my husbands family for the holiday season.
Lovely work. Digitizing Company Nice.
ReplyDelete