Showing posts with label 2021 qal. Show all posts

Monday, December 13, 2021

The Bonnie and Camille Quilt Bee: Month 12

 Hello again, today I want to share some tips with you on finishing up your Bonnie and Camille Quilt Bee Quilt! I had so much fun making the extra filler blocks and putting it all together and I am in love with how my quilt turned out!
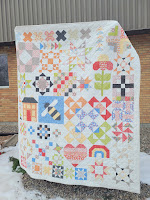

The finishing instructions begin on page 130. We need to make a couple filler blocks and than assemble our top in sections. 

The flying geese on page 130 I made as directed. Normally I use my Flying Geese Ruler from Creative Grids, but this time I just followed the pattern. You are going to use first 6 on page 130 and the next 7 will be used on page 132. 

When putting your Criss-Cross blocks together, you can widen or narrow your B filler piece to get it to right length if needed. And this goes for all the filler pieces in the quilt. If you need any of them to be bigger or smaller to get the sections to fit together properly just make them the size needed. 

On the bottom of page 131 you are instructed to make 6 more Geese. For this one I did use my Ultimate Flying Geese ruler and made 4 at a time, and just ended up with 2 extra geese. I prefer to make my Geese this way as I can trim them to the correct size. 

For the rest of the quilt the assembly is quite straight forward, especially if you work best off of pictures. If you work off of worded directions it may not be so easy, as there are not a of written instructions. There are pressing instructions displayed on each image, but I just pressed in the direction that my fabric seemed to want to go. 

When I assembled my quilt top I laid the whole thing out on the floor before sewing any blocks together. This was to see if I would like the color distribution through my quilt. I did end up swapping a couple blocks around to get a layout I was happy with. Don't be afraid to do this to your own. It is your quilt and nobody will know if you swapped locations of blocks. Make sure any blocks you do trade are the same size, otherwise it will get tricky for you. 

In my quilt I swapped the house and the bee, they are the same tall and in the same row so it worked well, if I hadn't I would have had a lot of orange and red in the lower middle section. I also trade some blocks on the right hand side of my quilt to spread out some more of the reds. 

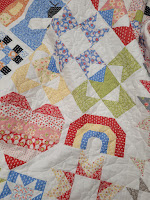
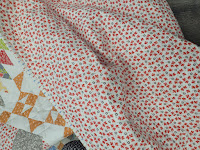
I used a cotton print from the Figs and Shirtings Collection by Fig Tree for the backing of my quilt, which is the same collection that I used for the front. I quilted it with loops, a simple pattern that is not distracting from the blocks at all. I bound it with a light print from the collection. 
I am planning to hang this one in my sewing space. 
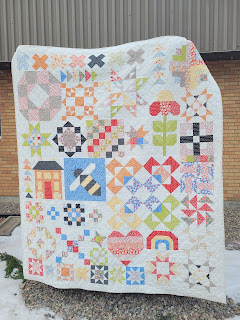

Thank you all for sewing along with me this past year. I have loved seeing your blocks and can not wait to see your finished tops and quilts. 

This is going to be the last blog post for awhile. I have not yet decided if I will post again in the future, but for now I would like to focus on some other avenues at the shop. Thank you for taking the time to read all my posts, I appreciate it so much. 

Kayla

Monday, December 6, 2021

The Bonnie and Camille Quilt Bee: Month 11

 Hello again! I am posting Month 11 for our Bonnie and Camille Quilt Bee just a little early, but I thought if I posted it today than I could post the finishing next week. Because if you are anything like me, once you get those final blocks finished you are not going to want to put it away again, but rather jump right into assembling your blocks into a finished quilt top!

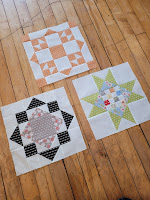
This month we have 3 blocks to make, each one of them different. We have the Starburst Block on page 124, the Summer Block on page 126 and the Sunshine Block on page 128.

Starburst Block. For this block I chose to use a color that I felt I had not used very much of yet. Maybe you want to take a look at all your blocks and see if there is a color that is a little under represented. The block itself goes together really nicely. When making the center of the block I pressed the blocks in each row to A and when assembling the rows pressed both the top and bottom to the center, this helped with nesting seams and getting a nice flat center. When making the CG units I pressed my Left Units towards the G and my Right Units toward the C, this allowed me to nest the seams when assembling them and I got nice points there. 


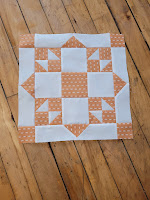
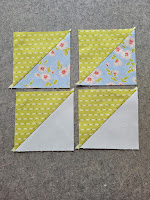
Summer Block. For this block I had a mistake in my pattern book in the cutting instructions. For B in the background it says to cut a 2 1/2" strip and subcut into 4 - 4 1/2" squares. You need to cut your strip 4 1/2" in order to get the squares, 2 1/2" just won't work. To make the 4 hourglass units I did not cut my A, D and E squares into triangles instead I made half square triangles and than used those to make the quarter square triangles.

 To do this: (A is white, D is green and E is blue in my photos)

 Draw a line on the diagonal of the wrong side of a D square, place right sides together with a A square and sew a 1/4" from each side of the line, cut apart on the drawn line and press towards D. This will result in 2 AD HST units. 

Repeat with the remaining D and 1 E squares for 2 ED HSTs. 

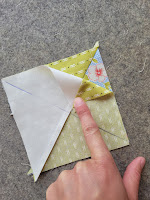
Draw a diagonal line on the wrong side of a AD HST going across your stitch line. 

Place right sides together with a ED HST making sure your D pieces are not on top of each other and your seams are nested tight together. Sew a 1/4" from each side of the line. Cut apart on drawn line and press open. 

Repeat with the 2nd units to make a total of 4 ADED quarter square triangle units, also known as hourglass units. Trim to the correct size using your favorite method. I used my 4-in-1 Creative Grids Half Square Triangle Ruler. 

This is how I almost always make mine, and it avoids working with the bias edges too much.

The rest of the block I assembled as the pattern instructed. 


Sunshine Block. For this block I used my Ultimate Flying Geese Ruler from Creative Grids and the heart method to make 4 at a time flying geese. The cutting for this is a little different as you cut one large square and 4 small squares to make 4 Flying Geese, but I love the extra trimming room it provides. The sizes to cut are written on the ruler and how to trim are included in the pamphlet provided with the ruler. Once I had my Geese made I pressed completely opposite of the pattern, because I dislike pressing geese towards the top point but would much rather press towards the flat bottom of the geese. 
Aside from all my changes it was a fun block to make. 

I will be back next week to share some assembly tips!


Have fun making your blocks and have a great week. 
Kayla


Monday, November 8, 2021

The Bonnie and Camille Quilt Bee: Month 10

 Welcome to another month of the Bonnie and Camille Quilt Bee. This month we are making the blocks in the Month 10 section. We have to make a total of 3 blocks, each one of them a different pattern. 

We will be making the Rainbow Block on page 119, the Sparkling Star Block on page 121 and the Spring Block on page 123.


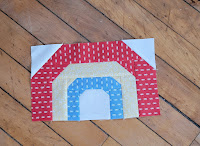
Rainbow Block. This block is super fun to make and turns out so cute. Be sure to be careful when sewing the flip and stitch corners. You want to be sure your stitch lines go through each corner not to either side. This will help your fabric flip over nice and straight. To help with this start stitching on a scrap piece of fabric and continue on to your actually unit, this will help your corners not get eaten by the feed dogs and needle and will assist in getting your corner lined up neatly under the needle. 

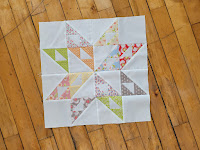
Sparkling Star Block. This block is a little time consuming with quite a few little points. I used my Cat's Cradle Ruler from Creative Grids to make each of the units. With the tool I was able to just cut rectangles and squares and make the block without any triangles. It worked very well and my block turned out good. The ruler does make 2 units at a time and because I wanted 12 different fabrics in my quilt block just like the pattern I do have enough units to make another block. I am thinking I will make it into a mini to hang on the wall in my sewing room. 


If you follow the pattern instructions it may be helpful when sewing the A triangle onto the D side to sew with D on top so you can see your previous stitches and not cut that little point off of the triangle that is in the center of the unit. This block is a good one to use up some small pieces as you only need a little bit of 12 different fabrics.


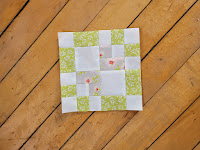
Spring Block. This one was nice to make after the Sparkling Block. It was a little simpler even if there are a number of small squares. I followed the instructions for this block as they are written in the pattern. 

How are your blocks coming along? We only have one more set of blocks to make next month and than we get to assemble our quilt top! I am very excited to see all these blocks come together. 
Have a great week. There will be no blog posts for the next few weeks as I am leaving today for a long vacation with my family which we are all very excited for!
Kayla


Thursday, November 4, 2021

Garden Sampler BOM: Month 11


It is already November! this year is flying by. 
We are on Block 11 of our Garden Sampler BOM, which means we are making the rosemary block. I made a couple adjustments in the cutting this month. Everywhere that the pattern asked for an 1/8, I rounded up to the nearest quarter. This gave me extra trimming room on my HST, 
The Pieces

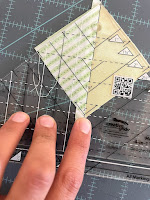
For these Half Square Triangles I tried a little bit of a different squaring method, I still used my 4-in-1 HST ruler, but I pressed my triangles first, then found the appropriate markings on my ruler to trim. 
Trim up the side and top, then flip your block and ruler and trim again. 

Trim 1


Trim 2

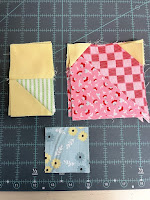
On the big pink HST we need to add Flip and Stitch pieces, for those I used my diagonal seam tape. 
The Components

This block uses a little different method of putting the final block together, but we have done it before. I drew a box around my center block, 1/4" away from each edge so that I knew when to start and stop my seams. 
And now we have Block 11! I love how this block turned out, and I am so excited to put my blocks together next month. There is a lot of piecing involved in the sashing and we still have one more block to make, so that might be a two part blog so that I don't overwhelm you, and maybe to give me a bit more time to sew. 

Now I better get back to work getting everything done that I need to before I take off to Florida with my husband and with Kayla and her family next week. 
Have a great month everyone! I'll be back to share block 12 next month. 


Monday, October 18, 2021

The Bonnie and Camille Quilt Bee: Month 9

 Happy Monday, I hope you all had a great Thanksgiving Weekend. Today we are moving on to Month 9 in our Bonnie and Camille Quilt Bee. You had an extra week to catch up so I hope you are ready to move on. 

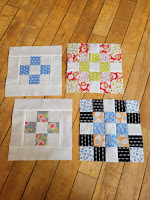
This month we need to make total of 4 blocks, but they go quick because it is actually only two different block patterns. The Nine Patch Block can be found on page 116 and the Plaid Block can be found on page 117.


Nine Patch Block. We need to make 2 of this block for our quilt. This one takes only a little bit of a print fabric, so I used a blue that I had very little left of but wanted in the quilt once more and a Black print that is one of my favorite in the bundle to get a little more of the black in the quilt but not be too overpowering. It goes together really well, but if you are unsure about getting it nice and square you can cut your borders for the block a smidge bigger and trim the block to the correct size after pressing. 

Plaid Block. Again we need to make 2 of this block for our quilt. I chose a main print for each of my two blocks and then chose some accenting prints afterwards. I love how different the two blocks look from each other with different fabric and the darker colors in different spots. This block goes together nice as well, just be careful to gently press those strip sets so you don't stretch your fabrics at all.

We only have 6 left blocks left to make once these are done, and I am really wanting to get mine finished. I got my backing and binding last week, do you have yours picked out yet or will you wait until the top is finished?

Kayla

Monday, September 13, 2021

The Bonnie and Camille Quilt Bee: Month 8

 Welcome to another Month in our Bonnie and Camille Quilt Bee. We have reached Month 8 and we need to make a total of 3 blocks this time. They go together pretty quickly, I did all 3 of mine in a couple hours this past Saturday morning. 

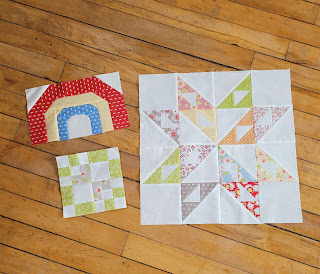
We need to make the Home Again Block on page 110, the Lighthearted Block on page 112 and the Neighborhood Block on page 114. 


Home Again. I love house blocks so I was thrilled that there was one in this quilt. I have a couple tips for you for this block. 

First if using directional fabric for the windows, be sure to pay attention when cutting so that they all go the same way when in the block. O and Q should both be the same height when cutting, and the widths will be different. 

When I have a lot of piecing in a section and have to add borders at the end I like to wait to cut those until I have the center done, than I can adjust the borders if needed. In this block you may want to cut your "B" pieces a little wider than mentioned, and than after you sew them onto the center section, trim the block to the correct size than add the roof part. This will ensure you don't need to stretch anything. 

When making the shrubs pay careful attention to what edges you place the little squares and double check before adding the next fabrics that you have them oriented the right way. Otherwise you may end up with some upside down bushes outside your home. 

I actually ended up making this block twice. I chose some fairly muted colors for some of my sections the first time and was not happy with the way it turned out, so I went much brighter the second time. 

First attempt, that I didn't even finish all the way, a little dull compared to the other blocks I have been making


Lighthearted Block. Heart Blocks are another of my favorites to make, so this was a fun month for me. And this heart was really quick to make. 

6 different prints are needed, and I was able to make that work with my Red Fabric so that is the color I chose. One of my pieces was actually a few inches shorter than it was supposed to be, but because of how the block was constructed I was able to make it work anyways. I just used it as my bottom strip and centered it with the fabric above it. 


Neighborhood Block.
For this block be sure to pay attention to the first step when sewing. You need to sew on the drawn line to make the HST. This is different than how we have done the others in this pattern. 

Other than that it's just a bunch of Flip and Stitch Corners and some assembly of the units to make the block. I suggest laying out all the units before sewing them together so that you get the colors arranged how you want them. I also do not like pressing seams open so I will post a picture of how I pressed my seams so they all nest. It is just personal preference, and I use a really hot iron and don't like burning my fingertips. 


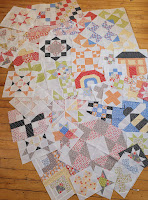
That is it for this month. Here are all my blocks so far!


Have you made any of the other quilts in this book yet? Two of the blocks we need to make this month are used for other patterns in the book too. The Lighthearted Block is repeated several times to make the You Have My Heart Quilt on page 8. And the Neighborhood Block is used together with the Criss Cross Block from Month 3 to make the Legacy Quilt on page 12.

Kayla


Thursday, September 2, 2021

Garden Sampler BOM: Block 9

 It is the beginning of a new month and time to pull out those Block of the Month projects again. 

We are in September already, which means back to school and back to a normal routine for many people. How do you feel about back to school? September for me means that my wedding is so close!!! It is Wedding Month!!! So for me September is a bunch of last minute plans, last minute decorating, showers, and preparing to get married and move out. Today I was off to Calgary to pick up my dress! But I did sneak a bit of time in to get my block finished. 

For this block I changed the cutting a little bit, the only thing I changed is where it had 3/8" I changed that to 1/2" just so I'd have a bit more room to square up my HST

The Pieces

I found that piecing this block was not too difficult, there is a couple HSTs and a couple flip and stitches, which I used my Diagonal Seam Tape for.
For the Half Square Triangles I used my 4-in-1 HST ruler to square them up, but in my excitement to get the block finished I forgot to take pictures of how I used the ruler this time, oops. 
But we have done many demos on this Trim Tool, so be sure to check out our Facebook videos to learn more if you are unsure about it.

The Components

Once you have the components made this block just has a simple nine-patch construction and the block is finished! 
My Block 9

Now that I have this block finished, I am going back to my decorations and seating chart to get everything ready and off my mind. This block was a good break, and a good distraction for a few minutes though. Have you been keeping up? Is your sewing room a good break and distraction from the craziness of life for you?

Just a reminder that we will be closed Saturday Sept. 4, and Monday Sept. 6 for the Labour Day Long Weekend. 
We will also be closed Friday Sept. 17 for Carrie's Wedding. 

Monday, August 9, 2021

The Bonnie and Camille Quilt Bee: Month 7

 Welcome to another month of our Bonnie and Camille Quilt Bee. While last month we had it quite easy with just 3 simple blocks all in the same pattern this month we have a little more work ahead of us. 

We need to make 4 different blocks, and they all vary in size which is fun. 

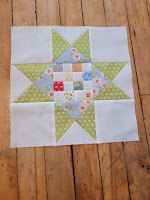
We need to make Flutter on page 104, Friendship Star on page 105, Good Times on page 106 and Happy Day on page 108. 


We haven't made many half square triangles yet during this quilt along, but this month there are some in every block. I used my 4-in-1 Half Square Triangle Ruler from Creative Grids to trim my units to the correct size each time. 

First up Flutter. This one came together fairly quick. I chose a print that I hadn't used much of yet. It only takes one print and the background so choosing the fabric didn't take as long as it normally does. 

As mentioned above I used the 4-in-1 ruler to trim the Half Square Triangle Units to the correct size. For this block I made them as directed, pressed to the dark, and than trimmed all 4 sides of the unit, using the guide lines on the ruler. 


Friendship Star. I love making Friendship Star blocks, they are definitely in the top 10 of my favorite blocks to make. I again used the 4-in-1 ruler to trim up my HST units, than assembled the block as directed. 


I like how for all the HST units the pattern instructs us to oversize the units to allow for trimming room, it definitely helps me with accuracy and getting nice points. 

Good Times. This block is a little more work. It is a large block and there is quite a few Half Square Triangles to make. 

I screwed up when making my block and had one HST facing the wrong direction in each Corner Unit. It was probably because I was making this block at 10:30 on a Saturday Night, needless to say I spent a lot of time unsewing those blocks and than sewing them back together correctly. Be sure to watch the orientation of each HST to avoid making the same mistake as I did. 

OOPS!

Another tip is to choose fabric that is not directional, I spent a lot of time making sure my prints would go in the same direction throughout the block, and it would have been a lot quicker to use a print that was not directional. Now if you really want to use a directional print and want all your pieces going the same way, mark your blocks as shown in the photo below. Than make the Half Square Triangles as directed, lay them out as shown on the top of page 107 and see what way you need your last unit to go than mark that block and sew it. I gave mine a good finger press so I wouldn't mess it up. (Don't sew your blocks as mine are pictured because that is where I made a mistake, the directional prints are correct, but my floral should be spun 180 degrees)


I sewed my four HSTs together into corner units but than assembled the block in rows rather than quadrants, I find it a little easier to press it flat this way. 


Happy Day. This block was fairly quick to make, just a few Half Square Triangles and nice big squares. For this block I trimmed my HSTs before pressing them. It is a little quicker this way, and you just need to line up the correct line on your seam. This block I assembled in rows as well, and I just pressed each row in an alternate direction so each of my seams nested nicely. 


Have fun making your blocks, and enjoy the rest of Summer. 


Kayla