Welcome to the first month our Bonnie and Camille Quilt Bee Sew Along.
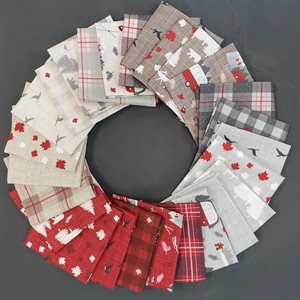
The fabric I have decided to use is Figs and Shirtings by Fig Tree. This is stepping out of my comfort zone and Carrie and Esther were both pretty surprised by my choice, but I am really excited for it.
I am using a fat quarter bundle for the blocks and I have 5 and a half meters of Bella Bleached White Solid for my background. The pattern is not written for fat quarters, but I think I can make it work, and we have yardage available of in the shop if I do run stuck.
I posted a photo of my fabric on Facebook last week, and if you are joining in I would love to see a photo of your fabrics, post a picture in the comments section of my post from last week or send them in an email to me at the email address at the bottom of this post.
Alright this month we are making 3 blocks, The Beehive Block on page 78, the Bee's Knees Block on page 79 and the Bliss Block on page 83.
If you want to test out your seam allowance for this quilt, I suggest starting with the Bliss Block on page 83. It is a nice easy one to get in the swing of things and by the second seam you will know if you need to adgust your seam allowance for this quilt at all. (I don't know about you but I find some pattern designers use a scant quarter inch in their blocks while others are fairly generous)
The Bliss Block itself is quite simple to construct. Follow the black arrows in the diagrams for pressing directions and your seams will all nest really nicely.
Going back to the Beehive Block on page 78 now. First step is to make those half square triangles. My tip here is don't skip the trimming! Sometimes it can seem tedious especially if you are only trimming a sliver off, but it is definitely worth it in the end. I like to use the Creative Grids 4-in-1 half square triangle ruler to trim my blocks. If you find your Half Square Triangles are too small to trim to the correct size, try stitching just a touch closer to your drawn line.
The rest of the block is not hard to assemble, just follow the diagrams for color placement and press open to cut down on some bulk.
The Bee's Knees Block. This block is a little more intense. It has a lot of pieces and some of them are pretty small. However labelling the pieces as you cut and going through step by step will make it a lot easier. One thing when cutting is to not cut G and H until the block is finished, than if your block is a little small you can get it up to the right size by making the block borders just a touch wider.
I used Alphabitties to label my pieces as I cut them.
The antennae unit it made up of most of the small pieces, if these intimidate you, you could always cut them a little larger, than sew together and trim down to the correct size after they are pieced and pressed. I cut them as instructed an pressed to the large square rather than pressing open.
When making the wings, be sure to make one opposite the other so you have a left and a right and don't end up with 2 of the same.
Piece A is a pretty large piece on the bias, so a couple pins will help to prevent stretching on this.
When your block center is complete, measure it, if it thee size mentioned in the pattern cut your borders as instru
cted. If it is a wee bit small cut your borders wider than instructed to compensate for this.
I can't wait to see your blocks. I will post mine to our Facebook Page, and you can put a photo of yours in the comments of that photo or email them to me. My email address is below.
Month 2 blocks will be posted on March 8.
Have a great week,
Kayla
my email address is kayla@chickenfeedquilts.com


