![]() |
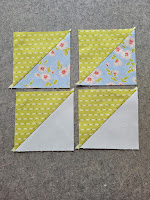
Using my Folded Corner Clipper |
![]() |
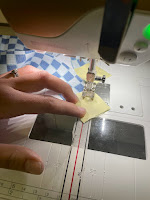
Sewing my 1/4" following the Seam Tape |
![]() |
Using my Folded Corner Clipper |
![]() |
Sewing my 1/4" following the Seam Tape |
We took February pretty easy at the shop, and while the store was busy, we did not do a lot of extra events, as we were supposed to be on vacation. However even though we are just at the very start of the month, March is looking to be quite busy.
Today we had a Facebook Sale, which is always fun. I upload a photo album of items for sale, and you shop from the comfort of your home. We will be sending out invoices tomorrow, so feel free to check it out on our Facebook Page and see if there is anything left to purchase.
This evening we have the first session of our sold out Tabletastic Club. We will be making a Tablerunner from the book Tabletastic together via Zoom
Our weekly Facebook Lives resume tomorrow. With the first one being a PhD checkin, next week we start a new sew along called Stitch Pink. We will also be touring my Sewing Space at the end of the month. This week Friday we have an Open Sew Day via Zoom, and another one on March 19. You can sign up for that by sending me an email.Next week Friday there is a Bag Club Session taking place also via Zoom, I think there are still a couple spots left if you want to jump in on this fun class. Just click here to register
Saturday, March 20 is Worldwide Quilting Day! We are still in the planning process of our event but we will share all the details in a newsletter, as well as on the blog next week.
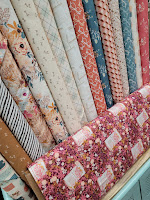
We ordered a lot of collections that were due to ship in March so we should be getting a lot of new fabric for you all to shop from as well. All of us have been sewing up a storm, so we will be hanging up lots of new quilts in the next few weeks and making new kits as well.
Happy Sewing
Kayla
Have you ever been in a rut when quilting? Where you don't feel inspired or don't feel like quilting? I think it happens to everyone, but how do you overcome it? I have a couple things that I do when I feel this way.
One thing I have found that always helps is visiting the Quilt Shop. It is hard to walk in and not feel inspired and want to create something new and I often end up walking out with a new project to work on.
Sewing with friends is always a great way to get out of a rut too. It may be a little more difficult to do right now, but if you can't get together physically, there are a few different ways to do this virtually. We actually have Open Sew Days twice a month virtually at the shop. Just send me an email, and I will send out the link to join in. We had our first one last Friday and it went really well. It was nice to see other people and what they were working on!
One last thing I do is clean my sewing room. My sewing space is rarely a mess, but when it is I find it hard to work on a project. Just cleaning it up and getting organized makes me want to jump in and sew again!
Do you have any tips to get out of a sewing rut?
Kayla
Happy Monday, can you believe we are already in the last week of February!
Today I want to share with you some projects that Esther, Carrie and I are working on.
Esther has several different projects on the go at the moment.
She is preparing for our first Bag Club Session and is almost finished with her Double Flip Shoulder Bag.
Tabletastic starts next week and her sample for that one is ready to be quilted. She has a few Quilt Alongs that she is participating in:The Bonnie and Camille Quilt Bee that I am hosting through our blog, Esther has one of the kits using the Shine On Collection by Bonnie and Camille, there is one or two left in the shop if you want to jump in on this. (click here to purchase)
Stitch Pink which we are starting on our Chicken Feed Quilts Facebook Live next monthAnd a Mystery Quilt Along on the Creative Grid Girls Facebook GroupHello again. It has been several months since I have done a favorite products post, so I thought I would do one today. Some of these items may have been mentioned in previous Favorite Products posts, but that just confirms that they really are essential in our sewing space.
Esther has been making a lot of Table Toppers as gifts and in preparation for our Tabletastic Club that starts next month. She has been loving our little 2.5"x6.5" ruler and the 4-in-1 Half Square Triangle Ruler for making these smaller projects. The Acorn Pressing Solution, our Chicken Feed Mister Bottle and the wool mat have also been favorites of hers while making these table toppers.
Carrie has been loving her Purple LDH Scissors, they are sharp, cut nicely, and they are purple which makes her smile!
![]() |
In one month we are starting a new Bag Club.
This Club will run via Zoom Video Meetings.
We will meet on the second Friday of the month in March, April and May, from 10am-4pm.
Each time we will be making a different bag.
The patterns we have chosen to do are the Double Flip Shoulder Bag by Emmaline in March
The Roxy or Rozy Wallet by Serial Bag Makers in April
The Classic Market Tote by Andrie Designs in May.The patterns and hardware needed are available to purchase in our shop. We have sold out of the Double Flip Shoulder Bag patterns, but more are on order and they should be back in stock early next week.
We can put Hardware Packs together, and assist in Fabric Choices if needed.
You can sign up for the club by clicking here
Have a great weekend. There will be no blog post on Monday as it is a holiday.
Kayla
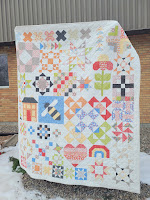
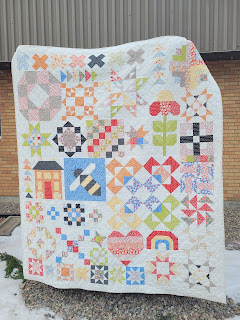
Welcome to the first month our Bonnie and Camille Quilt Bee Sew Along.
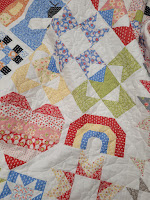
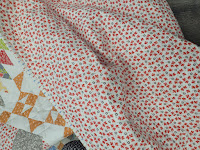
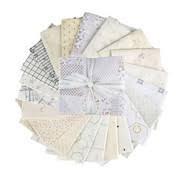
The fabric I have decided to use is Figs and Shirtings by Fig Tree. This is stepping out of my comfort zone and Carrie and Esther were both pretty surprised by my choice, but I am really excited for it.
I am using a fat quarter bundle for the blocks and I have 5 and a half meters of Bella Bleached White Solid for my background. The pattern is not written for fat quarters, but I think I can make it work, and we have yardage available of in the shop if I do run stuck.
I posted a photo of my fabric on Facebook last week, and if you are joining in I would love to see a photo of your fabrics, post a picture in the comments section of my post from last week or send them in an email to me at the email address at the bottom of this post.
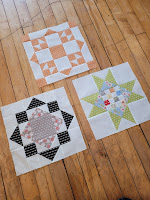
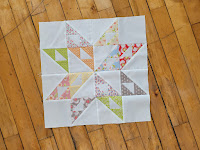
Alright this month we are making 3 blocks, The Beehive Block on page 78, the Bee's Knees Block on page 79 and the Bliss Block on page 83.
If you want to test out your seam allowance for this quilt, I suggest starting with the Bliss Block on page 83. It is a nice easy one to get in the swing of things and by the second seam you will know if you need to adgust your seam allowance for this quilt at all. (I don't know about you but I find some pattern designers use a scant quarter inch in their blocks while others are fairly generous)
The Bliss Block itself is quite simple to construct. Follow the black arrows in the diagrams for pressing directions and your seams will all nest really nicely.
Going back to the Beehive Block on page 78 now. First step is to make those half square triangles. My tip here is don't skip the trimming! Sometimes it can seem tedious especially if you are only trimming a sliver off, but it is definitely worth it in the end. I like to use the Creative Grids 4-in-1 half square triangle ruler to trim my blocks. If you find your Half Square Triangles are too small to trim to the correct size, try stitching just a touch closer to your drawn line.
The rest of the block is not hard to assemble, just follow the diagrams for color placement and press open to cut down on some bulk.
The Bee's Knees Block. This block is a little more intense. It has a lot of pieces and some of them are pretty small. However labelling the pieces as you cut and going through step by step will make it a lot easier. One thing when cutting is to not cut G and H until the block is finished, than if your block is a little small you can get it up to the right size by making the block borders just a touch wider.
I used Alphabitties to label my pieces as I cut them.
The antennae unit it made up of most of the small pieces, if these intimidate you, you could always cut them a little larger, than sew together and trim down to the correct size after they are pieced and pressed. I cut them as instructed an pressed to the large square rather than pressing open.
When making the wings, be sure to make one opposite the other so you have a left and a right and don't end up with 2 of the same.
Piece A is a pretty large piece on the bias, so a couple pins will help to prevent stretching on this.
When your block center is complete, measure it, if it thee size mentioned in the pattern cut your borders as instru
cted. If it is a wee bit small cut your borders wider than instructed to compensate for this.
I can't wait to see your blocks. I will post mine to our Facebook Page, and you can put a photo of yours in the comments of that photo or email them to me. My email address is below.
Have a great week,
Kayla
my email address is kayla@chickenfeedquilts.com