Monday, November 29, 2021

Oval Oven Mitt Tutorial

 Good evening. Today I want to share with you a little tutorial on how to make our favorite oven mitt. It is a fairly quick project and makes a great gift, either by itself or paired with an apron or some baking items. 

To make this oven mitt you need 

1/4 meter outer fabric

1/4 meter lining fabric

1/4 meter insul-bright

Fat quarter or 0.4 meter binding fabric

The first step is to make a quilt sandwich with your outer fabric, lining and insul-bright. The-insul bright does not have a right or wrong side so it does not matter which way it lays between your fabrics. Quilt the pieces together how ever you like. Straight lines works really well, I put it on my longarm and did a fun geometric design for this tutorial. 


Make an oval template. It should be 9" at its tallest point and 5" at its widest. We used Microsoft Word and made a an oval shape and put those dimensions to get it nice and rounded. 

Use your template to cut two ovals from your quilt sandwich. 


Next find the center of one oval and draw a line and measure out 3/4" from each side of that line and draw another line. Cut on the last two lines you drew. You are cutting out a 1.5" strip from the center of one oval to make your pockets. 


Bind the straight edges of these two semi-circles. 


Now align all the raw edges of your oval and your two halves. There will be a gap in the center. Baste them together so they don't slip when you are putting the binding on. 


The final step is to bind your oven mitt. You will need to use a bias binding because of the rounded edges. You don't need much. I cut a 16" square in half on the diagonal, and than cut a 2.5" strip parallel to that cut from each triangle and had more than enough. I machine bound my oven mitt for durability.


I hope you enjoy making these oven mitts for yourself and as gifts for friends and family. I think I may need to pick up some Christmas Fabric and make some Aprons and Oven Mitts for Christmas gifts for a few special friends this week.
 
Kayla

I tried to upload the template here but the few methods I tried would not work. If you send me an email I can always send you an email of the template and written instructions. 

Written Instructions for ease of printing 

Supplies Needed:

1/4m of 2 coordinating prints

1/4m of Insul-Bright

1/2m Binding

Coordinating Thread


Instructions:

Make a quilt sandwich with your two prints, sandwiching the Insul-Bright.

Quilt as desired.

Trace the template on the following page and cut (2) out of your sandwich.

From one of the ovals cut a 1.5” strip out of the center.

Bind the straight edges of the halves.

Put the two halves on the full oval, lining up the curved edges.

Baste in Place.

Bind using your preferred bias Binding method.

Repeat to make a full set.


Monday, November 22, 2021

New Fabric: November

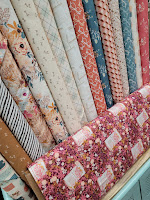
 Hello again. Our family is back from a wonderful vacation. We had beautiful weather and a great time spent together. This week I thought I would share with you some of the new fabric collections that have arrived in the last little bit. 

We have a couple new fabric lines from Art Gallery in the shop. Katarina Rocella's a new collection "Twenty" is here. 


Bookish by Sharon Holland is in the shop as well. It is selling quick and I think it would be great for Journal Covers to make and give away as gifts to friends and family. 


Wild Forgotten by Bonnie Christine is new as well. I love the earthy colors in this collection, combined with the whimsical prints it is truly beautiful.


 Check out the Look Books for each collection for some inspiration on what you could make. Look Book Link

We have a couple new Moda Collections in the shop too. 

We have a new Collection from Kansas Troubles called Hope Blooms. We have the full collection and yardage available. I love that she included the purple in this collection, if you like it too you better shop soon, the purple prints always sell out first. 


Sherri and Chelsi's new line Sincerely Yours is also here. It is such a great collection of pinks and purples, perfect for girly girls or for you to get a head start on your Valentines Day projects. 


There is new Riley Blake Fabric in our shop too. 

Coffee Chalk is so fun! Carrie quilted up the large panel that is included in the collection. And the prints would be perfect for mug rugs or aprons to gift to friends this Holiday Season.

If you love low volume prints be sure to check out Hush Hush, I am sure you will be able to find a few pieces for your stash. 


And we have one new collection from Andover called Believe. This bright collection had great prints with Ice Cream, Unicorns and Rainbows! 

As always there is many more new collections to view in store and on our website. So be sure to stop in and see us or browse our site. 
Have a great week! 
Kayla


Monday, November 8, 2021

The Bonnie and Camille Quilt Bee: Month 10

 Welcome to another month of the Bonnie and Camille Quilt Bee. This month we are making the blocks in the Month 10 section. We have to make a total of 3 blocks, each one of them a different pattern. 

We will be making the Rainbow Block on page 119, the Sparkling Star Block on page 121 and the Spring Block on page 123.


Rainbow Block. This block is super fun to make and turns out so cute. Be sure to be careful when sewing the flip and stitch corners. You want to be sure your stitch lines go through each corner not to either side. This will help your fabric flip over nice and straight. To help with this start stitching on a scrap piece of fabric and continue on to your actually unit, this will help your corners not get eaten by the feed dogs and needle and will assist in getting your corner lined up neatly under the needle. 

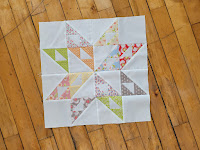
Sparkling Star Block. This block is a little time consuming with quite a few little points. I used my Cat's Cradle Ruler from Creative Grids to make each of the units. With the tool I was able to just cut rectangles and squares and make the block without any triangles. It worked very well and my block turned out good. The ruler does make 2 units at a time and because I wanted 12 different fabrics in my quilt block just like the pattern I do have enough units to make another block. I am thinking I will make it into a mini to hang on the wall in my sewing room. 


If you follow the pattern instructions it may be helpful when sewing the A triangle onto the D side to sew with D on top so you can see your previous stitches and not cut that little point off of the triangle that is in the center of the unit. This block is a good one to use up some small pieces as you only need a little bit of 12 different fabrics.


Spring Block. This one was nice to make after the Sparkling Block. It was a little simpler even if there are a number of small squares. I followed the instructions for this block as they are written in the pattern. 

How are your blocks coming along? We only have one more set of blocks to make next month and than we get to assemble our quilt top! I am very excited to see all these blocks come together. 
Have a great week. There will be no blog posts for the next few weeks as I am leaving today for a long vacation with my family which we are all very excited for!
Kayla


Thursday, November 4, 2021

Garden Sampler BOM: Month 11


It is already November! this year is flying by. 
We are on Block 11 of our Garden Sampler BOM, which means we are making the rosemary block. I made a couple adjustments in the cutting this month. Everywhere that the pattern asked for an 1/8, I rounded up to the nearest quarter. This gave me extra trimming room on my HST, 
The Pieces

For these Half Square Triangles I tried a little bit of a different squaring method, I still used my 4-in-1 HST ruler, but I pressed my triangles first, then found the appropriate markings on my ruler to trim. 
Trim up the side and top, then flip your block and ruler and trim again. 

Trim 1


Trim 2

On the big pink HST we need to add Flip and Stitch pieces, for those I used my diagonal seam tape. 
The Components

This block uses a little different method of putting the final block together, but we have done it before. I drew a box around my center block, 1/4" away from each edge so that I knew when to start and stop my seams. 
And now we have Block 11! I love how this block turned out, and I am so excited to put my blocks together next month. There is a lot of piecing involved in the sashing and we still have one more block to make, so that might be a two part blog so that I don't overwhelm you, and maybe to give me a bit more time to sew. 

Now I better get back to work getting everything done that I need to before I take off to Florida with my husband and with Kayla and her family next week. 
Have a great month everyone! I'll be back to share block 12 next month. 


Monday, November 1, 2021

Fun gifts to make

 Happy Monday. Last week I shared with you a little tutorial on how to make a lanyard. This week I thought I would share with you a few other items that are fun to sew and make wonderful gifts. 

One of our favorites is the Wax and Wool Tote by Noodlehead. I have gifted many of them over the years, especially to my son's Teachers. The pattern calls for wax and wool fabrics but i always use just cotton or if I am feeling fancy I will do cork on the bottom, but cotton works wonderfully. The pattern is all rectangles so it can be cut with just a ruler, rotary cutter and a mat. It goes together really nicely, with a simple front pocket, and a nice slip pocket on the inside. Esther made this one recently and added a little hardware to bling it up some. 


This little bag is really fun to make for kids and adults. It is called the Project Bag 2.0 from By Annie. The medium size is pictured below and it fits a coloring book and pack of crayons perfectly. Which makes for a great gift for any of the littles in your life.


 I made a second one using a panel by Zen Chic and it makes a great little bag to store projects in progress, handwork or favorite tools. 

The Pencil Pouch by Noodlehead is a fun little item to make. 
I have paired these with a Lanyard and snuck some little treats inside for a nice little Teacher Gift.
They are fun to make and easy to personalize if you know the person well. If not neutral colors our always safe. I gave each of my nieces one for their birthday this year with some pencil crayons inside and a new coloring book and they were all tickled. This pattern is a free tutorial. Just click here to reach it. 
Esther has decided she is no longer buying gift wrap or gift bags for kids. Instead she wraps everyone's gifts in a pillowcase. They make a great gift by themselves and are a fantastic alternative to the gift wrap. They are easy to make and there are many many tutorials online for different methods on how to make them. Another fun idea is to spend a day or an afternoon making them with your kids or grandkids. 
Have you made any of these items for gifts before?
After my vacation I will share a tutorial for a fun little hot pad that is quick to make and so useful in the kitchen. 
Next week is the 10th month in our Bonnie and Camille Quilt Bee. And Carrie be publishing the next post of the Garden Sampler Quilt on Thursday.
Have a great week.