Showing posts with label tips. Show all posts

Friday, February 15, 2019

Machine Maintenance

Regular sewing machine maintenance is so important and yet how many of us remember to do it.
As we sew lint from the fabrics and thread we are using build up in our machines and it needs to be cleaned out on a regular basis. Regular cleaning is very simple and can prevent many problems such as broken threads, thread bunches and more serious mechanical errors.
For my own machine I need to remove the needle plate and the bobbin case as well as the needle and presser foot for a little easier access.  My needle plate comes off with pressure on a small button, but some machines may require a screw driver. Once those pieces are removed I gently brush all the lint out with a soft brush that came with my machine. Avoid blowing the lint as this can cause it to get lodged in and cause more problems. After is cleaned, I give it a couple drops of oil in the places my manual instructs me and put it all back together. Once it is all together again I take a small scrap of fabric and sew with it to ensure that I don't have any excess oil and it is all together properly.
 It takes less than five minutes and makes all the difference in how my workhorse performs.
So now how often do I repeat this little sequence of events? I do it every time I empty my bobbin. At first this may seem excessive to you, but I find it an easy way to remember to do it, and since I need to remove the bobbin anyways it is just a few more simple steps. I also replace my needle at this time, since it too has been removed for the cleaning. The general rule for a replacing a needle is new project new needle. But since I am always working on multiple projects for me it is empty bobbin, cleaning and fresh needle and bobbin. Once you get into the habit, you barely even notice doing it. If you find every bobbin a little crazy, set your own schedule, like the first day of the month.

Your manual will have full instructions on how to clean your machine and where it needs oil (some machines say they no longer need oil, so double check that as well.) If you are still in doubt on how to clean or are a little scared to take pieces off of your machine ask your sewing machine repair person for a demonstration the next time you drop it off for its yearly checkup.
If you don't know where your manual is, just google the make and model of your machine and it is most likely available on the internet.
How often do you clean your machine, are you doing it often or are have you never done it before?

We will be closed on Monday for Family Day, our family is planning to visit the Chrysalis Cafe for their Family Day Special and head to Get Air to burn some energy that is building up in my boys. Hopefully everyone is over this flu bug that has hit our house again by then so we can make it happen.

Kayla

Pictured is my machine, and I cleaned it only a few days ago, and I am about halfway through my next bobbin, so as you can see the lint and threads can build up quite quickly.
I have seen machines where the lint is literally packed in, those machines were purring after they were emptied out.

Friday, October 12, 2018

Sale Fabrics, What To Buy?

As you all know (I hope) this weekend is our big clearance sale, and so this will be a fairly short post as my brain is a little overworked.
Our basement has a very large storage room and it is full of fabric, we usually call it the cage. Someone on Facebook called this storage room the "vault" and we all love it so much that we have renamed the cages to the vault. Well this weekend we have opened the vault and put it on sale for you. However it doesn't all fit on the sale tables, so as bolts empty we have been putting fresh ones out. We added several new collections and some blenders this morning, as well as some beautiful white on whites, a couple of the whites emptied out right away but there are 3 left.
As per special request we also put some Kansas Trouble Fabrics on sale this year, and they have been very popular. Since all of the lines blend together it is a perfect time to collect some background fabrics, borders and backings for your future Kansas Trouble Quilts. 
We have lots of collections on sale this time around. You can buy for an entire quilt, blocks, borders, backing and binding and get it all at a great price. 
On Tuesday I mentioned that pillowcases make great Christmas gifts as do Aprons, and Tote Bags. Pillowcases generally take just under a meter of fabric, a lot of Transformer fabric went out the door for pillowcases today, as did some adorable foxes, and cute florals. An unlined apron unlined you can do with a meter, lined would be two meters of fabric. 
If you have finished tops that are just waiting for the perfect top, dig them out, measure them and see if we have what you are looking for. I was working the sale room today, and I seen so many finished tops, and most of them left with a backing that worked really well, and at 50% off it doesn't get much better. 
Sales are a great time to build your stash, or stock up on background fabric and favorite collections. It is also a great way to buy backings for quilt tops that are finished or for quilt tops that have yet to be made.
The sale is on for one more day (Saturday, October 13) we will be open from 10am-4pm, we will add fresh bolts in the morning, and there are still some precuts and kits available too.
We got a new sign this week, so check that out when you arrive too.    
Kayla

Friday, June 15, 2018

Quilting

A question that we get asked frequently at Chicken Feed is “How do I choose how I want my project quilted?” 
There is no right or wrong answer here, just a few things to consider before you decide. 
M
You need to think about what you are planning on using the quilt for. If it is meant to be a quilt to cuddle with you will want a looser design that allows your quilt to poof up after washing. If you want more of a show piece or if it is a wall hanging you will want a tighter design  which will help the project stay flatter and be a little stiffer. 
SYou also need to consider if you want a simple meander all over, an edge to edge design that repeats, or something completely custom. if you are sending your quilt out to be quilted each of these options would come with different price points due to the work involved; so consider this when making your choice. 
I almost always do a simple meander or straight lines that vary in width over the whole quilt. The reason behind this is that I want  the fabric and the pattern I chose to be what people focus on and not the stitching. 
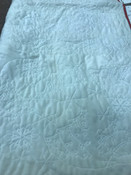
An edge to edge design can add an element of interest to the quilt by bringing something from the fabric into the stitching design, like stars, flowers, geometrics or other shapes. Esther has done edge to edge on many of her quilts in the past year. 
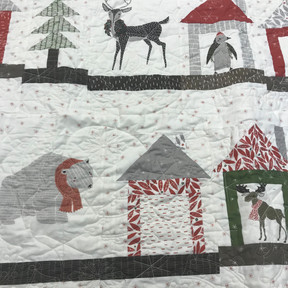
Custom quilting I think is an art in itself. It can really enhance a quilt by using the stitching designs to draw your eyes to specific parts of the quilt and away from others.  In the past few months a lot of people have been doing fun, custom quilting on the Dream Big Digital Panel by Hoffman, I highly suggest you check them out on social media. In these cases the stitching took what was a beautiful panel and brought it to the next level. 
M
Quilts with a lot of different components and blocks can also benefit from custom quilting in each space. Patterns with a lot of negative space are also a great place to let the creative juices flow and add an extra bit of interest to the project. 
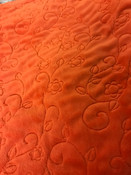
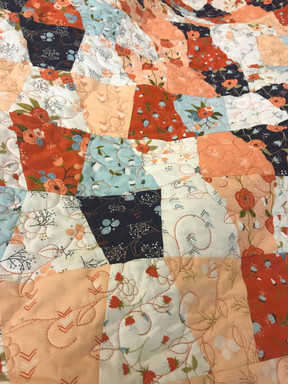
When you have an already busy quilt because of either the fabrics or pattern a simple design is usually best, adding more intricate stitching may have a negative effect. Esther did a fun Christmas themed stitching design on her Gingiber quilt this past winter, and while it looks great on the back of the quilt it does not show well on the front doesn't add anything to the quilt either. On the baby tumble pictured, the small floral design looks really fun on the cuddle but the fabric prints used on the front were already busy and the eye doesn’t know where to focus. 
S
What kind of designs to you choose? Do you go with the meander, a fun edge to edge or do you like the custom quilting? 
Today at Chicken Feed we got another slat board hung. This one will be used to better display the bag hardware that we have. I will be spending the next few days that I work getting it all hung up and organized.
Having the hardware displayed on a wall will make it easier to find what you need quickly, as well as help us make sure we keep everything stocked well. Follow us on Instagram to see my progress. 
I am hoping for good weather this weekend as my two oldest boys have a soccer tournament tomorrow and I for one am not keen on sitting in the rain while they play. I also have to make my Block 8 for the Be My Neighbor Quilt so I can post some pictures and tips on Tuesday evening. If you are quilting along on this one, you need to finish and share blocks 1-8 with me by July 3 to earn your free meter of fabric 
Have a great weekend, hopefully you can carve out some quilting time, 
Kayla

Friday, May 11, 2018

Binding

SBinding, it’s the final stage of putting your quilt together. It also often seems to be an after thought. After buying all the fabric for the top and than the backing people often forget about getting a binding as well. And again when putting it all together, you get the borders on your quilt, get it quilted and than oh yeah I need to bind this yet. 
I personally love binding. From choosing the fabric that pulls the whole project together, to hand stitching it in place. 
I love stripes for binding, I like the effect the stripes have, and that their are multiple colours from the quilt included in the final step. If there is no stripe, or the stripe isn’t calling my name I will choose a darker color, or a small print, something that you won’t notice grime from fingers on.  
S
I always do a double fold binding that I cut at 2.5”. I use my Stripology Ruler from Creative Grids to cut my binding, it’s quick and accurate and I can cut 8 strips without moving the ruler at all. I only cut my strips on the bias if I have rounded edges on my project, everything else gets cut selvage to selvage. 
S
Do you like to sew your strips together straight across or on the bias? I generally will do bias seams, but every once in a while I will sew them straight.
Once I have a long enough piece to get around the whole quilt, I take it to my ironing board and press it in half along the length, wrong sides together. I know not everyone presses their binding strips but I prefer to. I find it easier to work with when it is pressed. 
I almost always hand bind my quilts in the evenings while watching a favourite tv show with my husband. I machine stitch the binding to the front of the quilt and than flip it to the back and hand stitch the fold down. I use The Binding Tool by TQM products or the Creative Grids Bias Binding Simplified Ruler to join my final ends. Both are great and both have you tube videos on how to use them. 
S
I machine stitch to the front because than I know I have a nice consistent seam allowance on the front which is seen more than the back of the quilt. 
In the past few months I have machine bound a few quilts, and I must say my first one left something to be desired but practice makes perfect and the most recent one I did yesterday turned out much better. I prefer hand binding but sometimes time gets the better of me and machine binding is the answer. Also it never hurts to know a few different techniques. 
S
When machine binding I stitch my binding to the back and than fold it over to the front and use one of the decorative stitches on my machine or a simple zig zag to tack it down. 
My wonder clips work great for holding the binding in place while hand or machine stitching.
Esther recently came across some fusible thread. This also works great for holding down a binding before you hand stitch it. It works best in the bobbin, when placed in the top it is very hard to get nice tension. You sew it as you normally would, than give it a press and the the heat causes it to act like a glue. It works great for hems and installing zippers too. 
So how about you, do you prefer a certain fabric pattern for bindings, bias binding or not, machine or hand finished? 
I have four quilts that need to be bound so my husband and I are going to turn on a movie and I will get to work. 
Kayla
 

Friday, November 10, 2017

Borders

STonight I have question for everyone. Do you cut your borders to the exact length and sew them to your quilt? If so do you pin them in place?  Or do you like to wing it, and trim the extra length afterwards. I admit I used to just make sure my border strip was longer than I needed, sew it on and trim it when I was done. I could not be bothered to spend the extra time measuring the quilt, measuring the border material, cutting and than pinning it in place, by the time I reached the borders I wanted to be done. The problem was I always ended up trimming a little more off of one side than the other and my quilts were not as square as they should have been, especially those with multiple borders. I never even attempted borders with fun set in corners or centers because I was certain they would not line up. 
S
 I have mended my ways. I now diligently measure and cut the borders to size before they are stitched on. I start with the center of both my quilt and border strip, and clip this in place. Than I work outwards clipping every 10 inches or so, if needed I will ease extra fabric in so I stay square. I say clip because I use wonder clips, have I ever said how much I love these things! They are amazing, I have over hundred of them and use them all the time, if you do not have any you should definitely give the wonder clips a try! Anyways back to the borders. When you are clipping or pinning the strip in place you can be a lot more confident that your quilt will finish nice and square, and surprisingly it does not take that much extra time. As an added bonus if you have someone else do the longarming for you, they will love your quilt! I speak from experience here, quilting a quilt on which the edges are the same length is a lot easier than one that is out a couple of inches. 
M
I can tell you with complete confidence that the last quilt I did would not have been square if I had not measured, cut to size, and pinned each strip. The quilt started with a panel that I added some blocks to and than after that is was border after border until it was the right size. The final border I decided use some extra blocks from the panel and put them in the corners knowing that the corners would line up neatly. If I had wung it I am sure that I would have one side at least 3 inches longer than the other. After all that's only half an inch additional each set of borders, it adds up quick. But it is exactly 101" on both sides and 96" on both top and bottom! Win!  
Now time for another question, if you were in the latter category at the beginning of this post will you jump over to the other side or keep going with winging it because it works for you? 
Esther has left on her trip, she is gone for a couple more weeks, which means there is lots more daily deals to come! Every day that we are open while she is gone we will post a new daily special on Facebook. The special is good for one day only and while supplies last, no rain checks. If you do not have Facebook feel free to call the store and ask what is. Don't ask about the upcoming ones though because we have no idea what they are. You can also place a phone order but it must be paid for by credit card at that time. 
I will be joining Esther next week and so there will be no blog posts Friday, November 17, Tuesday, November 21, and Friday, November 24. 
Also we will be closed tomorrow (Saturday, November 11) in honour of Remembrance Day. Have a great weekend everyone.
Kayla

Friday, July 28, 2017

Does Thread Matter

In the past few weeks I have had a lot of questions about thread, so today i will try to answer some questions you all may have. First of all we quilt with a good quality 100% cotton and recommend that to all quilters. 100% cotton is soft and strong, wears well on your projects and doesn't fight the fabric fibres as they are both cotton(that is if you are quilting with cotton). Kayla, Carrie and I love Aurifil thread. And piece with a 40 or 50 weight, 40wt is a bit thicker. Auriful is a high quality Egyptian  cotton with long strands to reduce lint and thread breakage. We also longarm quilt with the 40 or 50 wt but find the 40 wt shows up a bit better than the 50 weight. I guess if you don't want to see the quilting 50 wt would be great.

M
 
Aurifil thread comes in many different weights from a 6 strand floss, 12wt, 28wt, 40wt, 50wt, and 80wt. we mostly have 50wt in the store with more than 120 of the 270 colours, we have some 40wt and 80wt and are hoping to build our collection very soon. We also have some sets by designers, many designers have signed on with aurifil and have thread colours to match their fabrics. That being said for piecing I use a light tan, light grey, white and a med./grey or brown for everything. I do match colours when appliquéing and like the 50 wt for that. It shows nice and lays flat on the fabrics.
We also love King Tut variegated thread for long arm quilting, we try to keep all of the King Tut colours in stock.  We have some magnifico for appliqué, it has a shine to it and  if you like hand appliqué, wool work, and stitchery we have some valdani and cosmo flosses and threads. 
Lots of time people gasp at the price of a good quality thread but when you think of the cost of your quilting project why wouldn't you spend a couple of dollars on good thread, and really thats all it is, a large spool of thread is only $14.50 and I'm not quite sure how many quilts it makes but I don't take many spools of thread home so I'm guessing about 5-6 projects maybe more depending on size and pieces and how much picking you do:(.  And your sewing machine will also love you as thread quality also affects the lint build up.
Last of all here is a bit of a chart to help you pick thread weights.
12wt-hand appliqué, hand embroidery, embellishing
28wt-cross stitching, hand embroidery, hand appliqué, hand            piecing, lace
40wt-machine piecing, machine quilting, machine appliqué,              long arm quilting, top stitching
50wt-machine piecing, machine appliqué, machine quilting,              long arm quilting, top stitching
80wt-hand turned appliqué, english paper piecing, machine              appliqué

                                                                                 Have a great weekend
                                            Esther